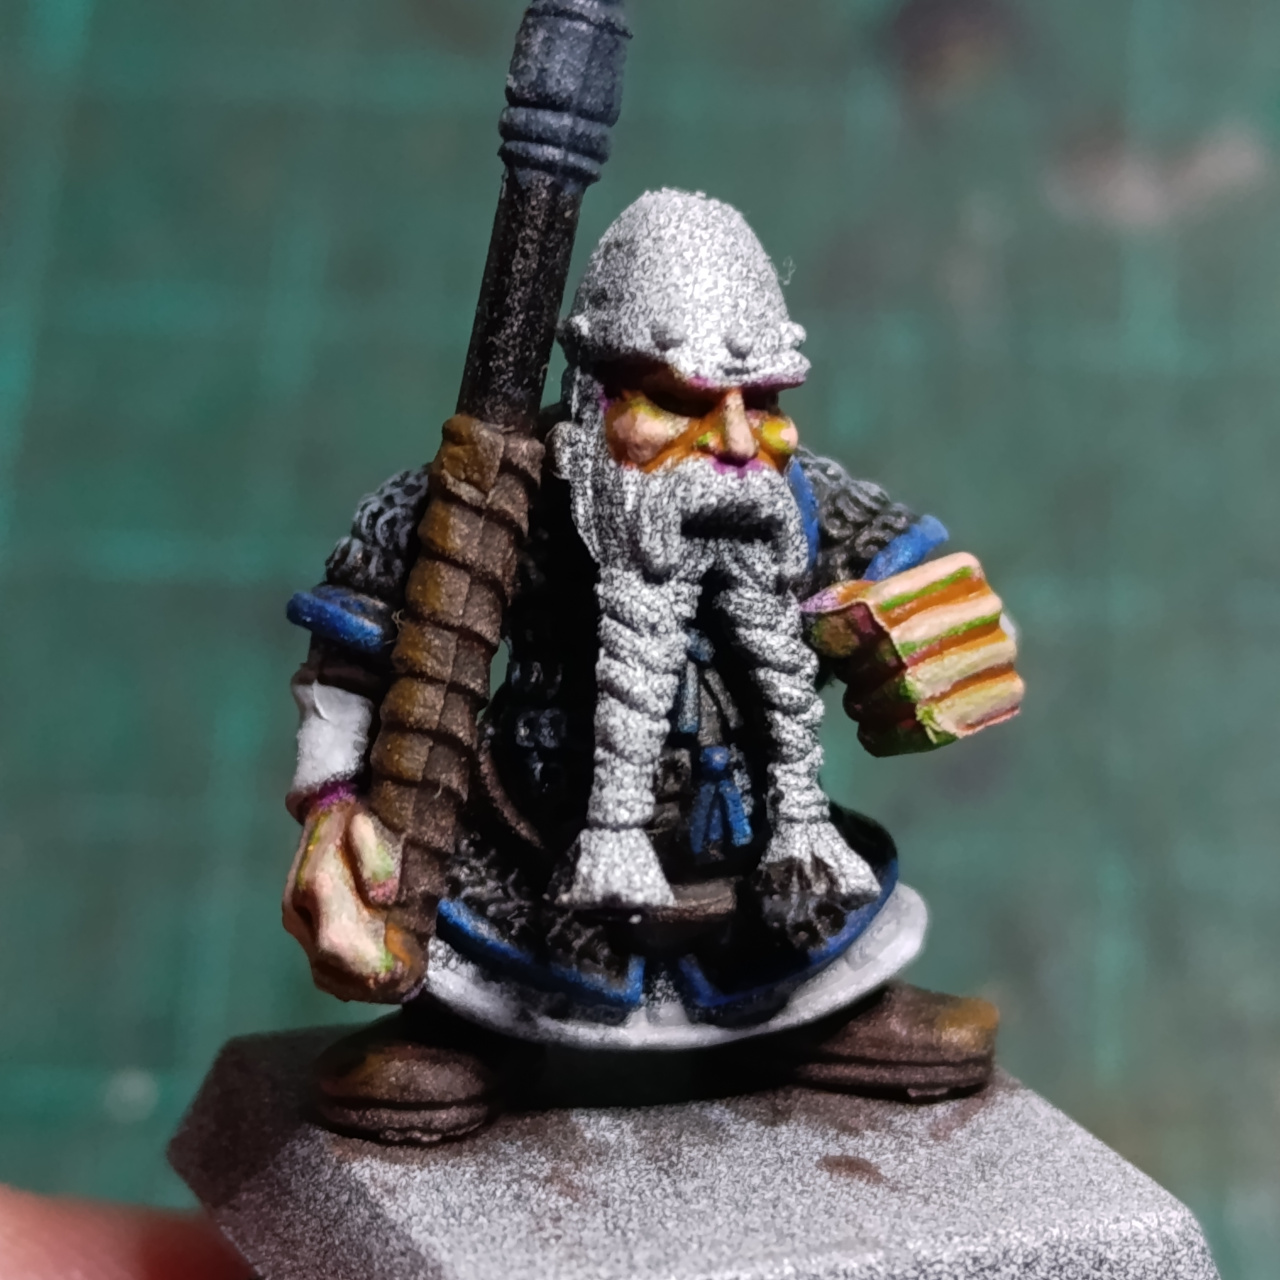
Finally got around to doing some more work on the dwarven spearmen I kitbashed last year, so I took the opportunity to document the process I use to paint hands and faces. It is somewhat counterintuitive, but it gives some interesting tones fairly easily. One thing it is not is fast, but then again you don’t decide to paint an entire dwarf unit in non-metallic metal if speed is of any importance.
Priming
I do all of my priming with spray acrylics. In this case I went for a full prime with a matte black and a zenithal prime with a gloss white. I’d avoid gloss for this normally, but it was all I had at the time.

Base coating
For a base coat, I used a bright violet acrylic – it says Azo Pink on the tube, but it looks kind of violet to me. I then applied bright green, in this case a Cadmium Green Hue acrylic, over any of the areas which I wanted to be moderately illuminated. This will be the majority of the miniature’s skin except for deep recesses or areas which are facing downwards away from the “light”.

To define the highlight areas, I used Naples Yellow. This goes anywhere which would catch more light naturally, like the top of the cheeks, the bridge of the nose, and so on. The process is not unlike value painting or painting in grisaille; you’re basically defining how much light each area gets. Unlike value painting, which is usually done in white, grey and black, here we’re using yellow, green and violet to add some undertones,

Glazing
To get from this synthwave nightmare to something more closely resembling a skin tone, I applied a glaze of Raw Sienna all over the skin areas. This is just a heavily diluted acrylic paint. The consistency you’re looking for should be enough to tint the underlying colours without obscuring them completely. On the other hand, we don’t want it to be too diluted because then it will pool in the recesses creating a different effect.
If you’re uncertain, you can usually find some spot on a miniature you can test it out on. In this case for example, the back of this miniature’s left hand will eventually be covered with a shield so it’s a good place to experiment – it will be hidden later anyway.

Second Glazing
At this stage the miniature will still look pretty weird, but that gets fixed easily by applying a second layer of glazing. This time I went for a slightly less diluted mix of Carnation Pink and a dash of Cadmium Red Hue acrylics. Rather than painting this everywhere, I kept it to the highlight areas only.

Small touches
Some areas such as the knuckles can benefit from a little extra highlight. Here I used the same glaze I used for the second glaze layer, boosted with a bit of Naples Yellow.

Arm’s length
You may have noticed from the photos that there’s still a bit of green visible. This is probably not great for a display miniature, but for a gaming piece it’s not so much of an issue – it’s not really visible at arm’s length. It just becomes part of the shading and stops the miniature from having an unnaturally consistent skin tone all over.

Hope this was useful!